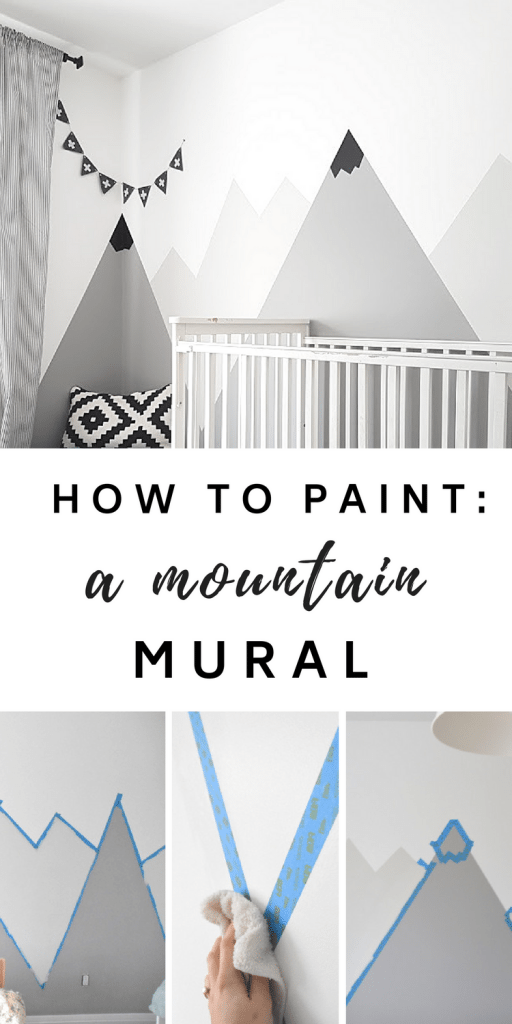
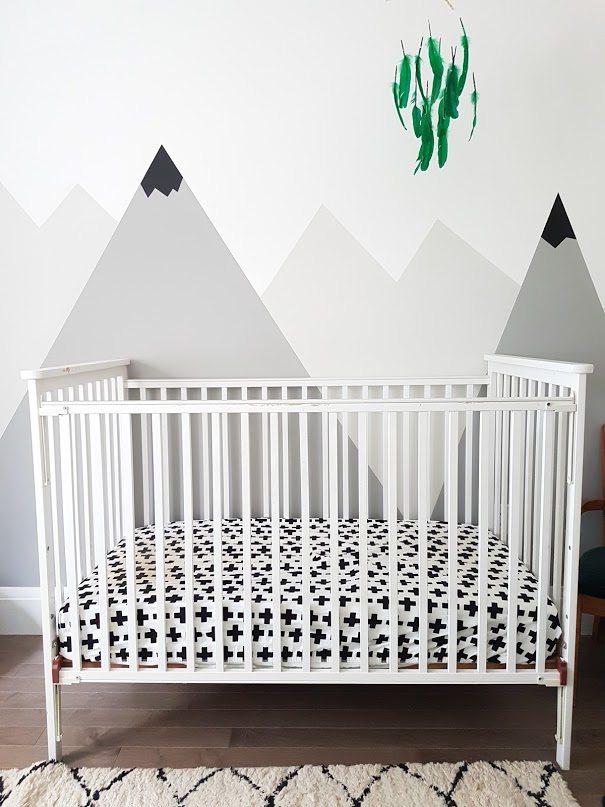
Mountain Bedroom Wall
With only a few weeks to go until baby #2's arrival, we have been starting to feel a fire under our butts to get this nursery into shape. I had a vision since the beginning of my pregnancy that I wanted to do a really graphic nursery mountain mural and, a high-impact room with an adventure, camp-y kind of vibe.
So the first item on the list?
A DIY nursery mountain mural:
What You'll Need For This Nursery Mountain Mural:
[Some links may be affiliate. Please see my Policies page for more information.]
- Wall Paint in 3 colours:
- Medium gray: I used PARA Paint's 'Courtyard' (eggshell finish)
- Light gray: I used PARA Paint's 'Runway Coach' (eggshell finish)
- Black: I used this flat black paint from a previous project, and it worked perfectly! I LOOOVE this paint.
- Good Quality Painter's Tape – I have had great results using this brand
- Damp Washcloth – Any washcloth that you have in your home is fine!
- Paintbrush & Rollers:
- Any of these small foam rollers and a tray for doing the large mountains
- A fine paintbrush like these for any touch-ups needed
How to Create your Nursery Mountain Mural:
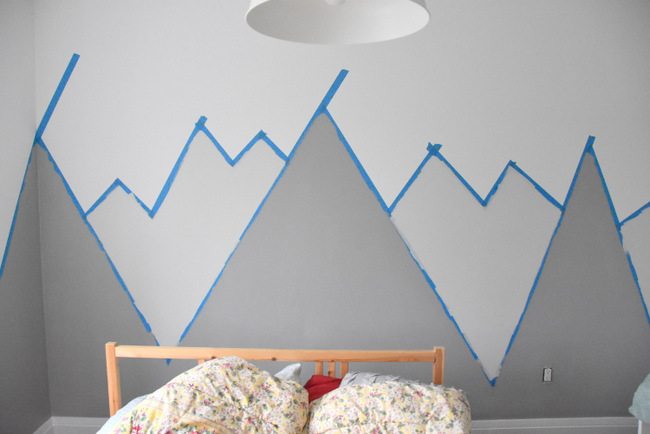
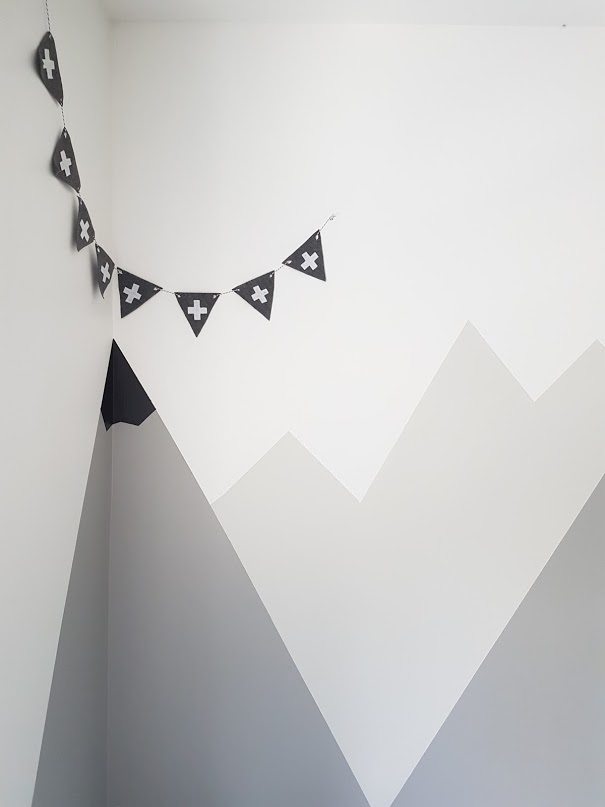
Step 1: Tape out 3 Forefront Mountains
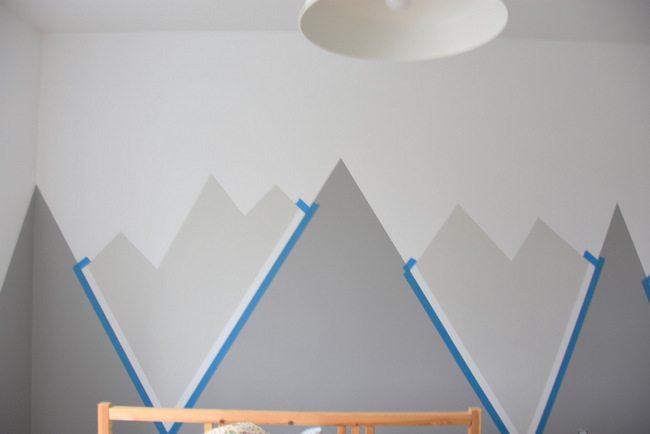
To start with, I created the three forefront mountains. I didn't draw any lines, just sort of went with it with the tape. The further left mountain crosses the seam between the two walls, which I thought would give it a bit more dimension.
At the bottom of the mountains where two meet, you need to go and trim the tape so that you don't have overlapping pieces that go down to the floor. Just use scissors to get a precise line with your tape.
Speaking of tape, this is a situation where you definitely want to use a quality painter's tape. I personally like this3M scotchblue painter's tape.
Don't get the cheap knock off stuff – saving the $2 won't be worth it when it comes time to take the tape off.

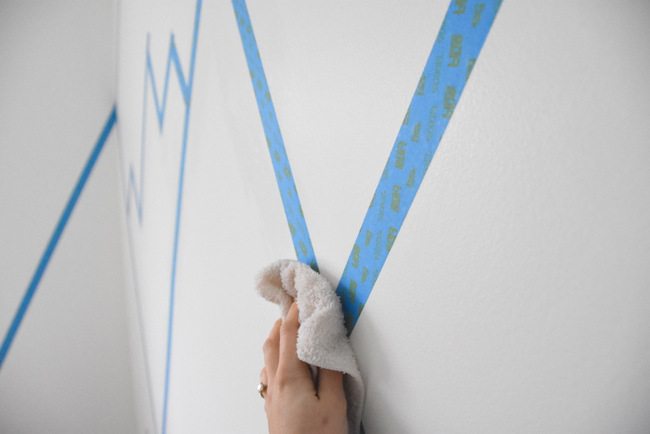
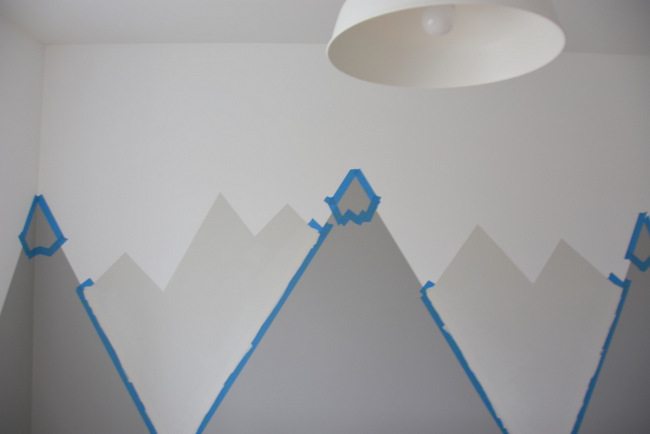
Step 2: Go over Tape with Damp Cloth
One trick that I read about to ensure that the tape gives the most crisp line possible, is to go over it with a damp cloth. The wetness supposedly activates some element of the tape glue. Since I wanted my lines to be really crisp, I went over all the tape with a damp cloth before painting.
You can see that I also added in the tape for the rear mountains. Again, I didn't plan them out – I just put tape up on the wall and stepped back to make sure I liked how they looked. I tried to keep the peaks nice and varied. Like the bottom of the front mountains, I needed to trim the tape where two pieces met to form the bottom corners.
Step 3: Paint Mountains
I painted the front mountains a medium gray and the background mountains a light gray. I did two coats, about an hour apart, before I pulled off the tape.
Step 4: Pull off Tape + Fill In Gaps
Don't let the paint dry for hours and hours before you pull off the tape. Always best to get it off after say 30-60 minutes when it's only partially dry, to avoid lifting off super dried paint.
Once the tape came off, I was left with this. You can see the gap between the two sets of mountains.
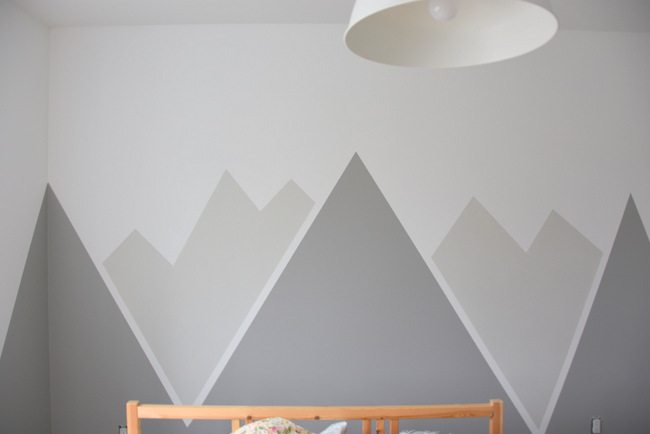
To fill those in, I waited until the paint was fully dry and then put up more tape following the line of the dark gray front mountains. I also had to add small pieces at the top to line up with the light gray mountain range.
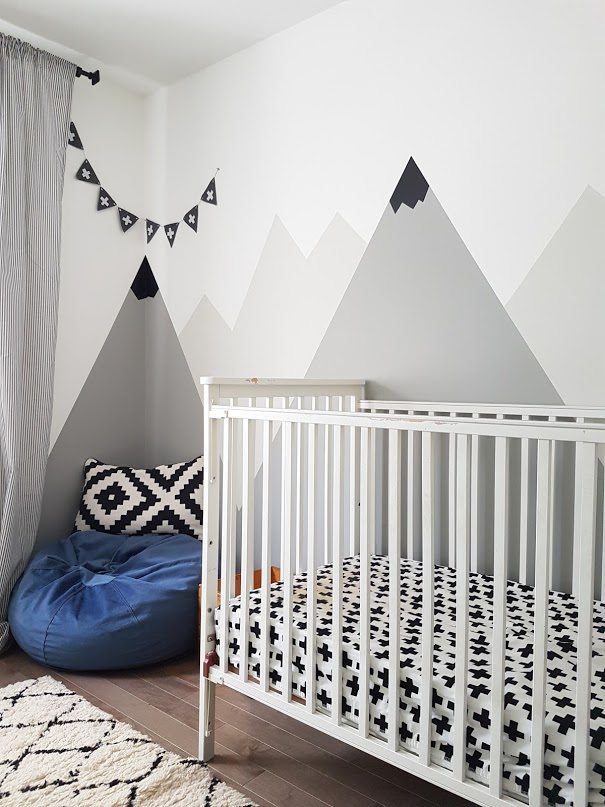
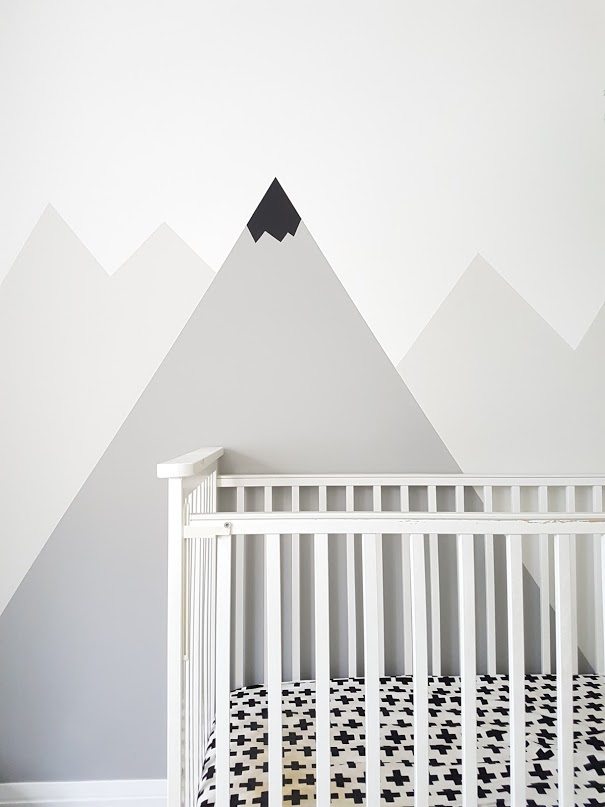
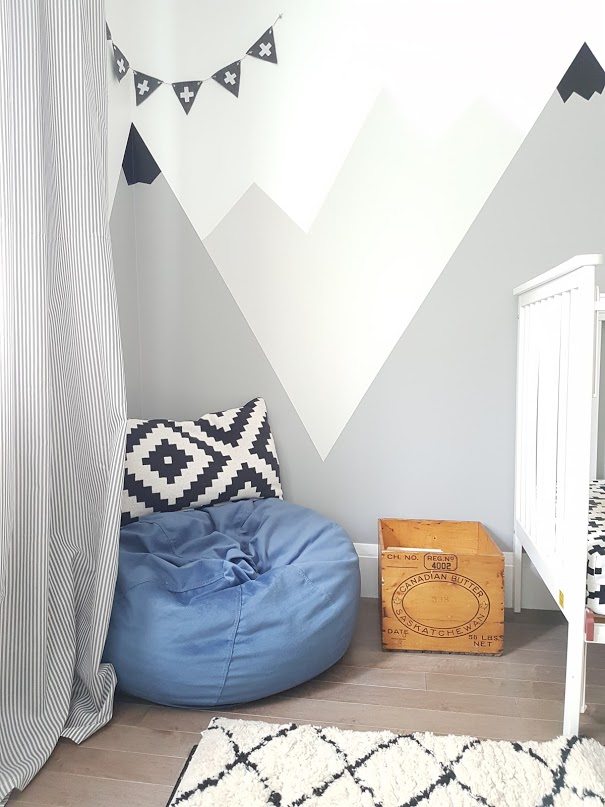
Step 5: Add your "Snow"
I also thought it would be fun to have "snow" on the peaks of the front mountains, so added those patterns in as well. I painted them in this flat black paint, and filled in the light gray paint.
The Result:
When the tape came off, this is what I was left with! Such a cute nursery mountain mural!
I'm really pumped about how it turned out. It feels graphic and fun, but not overwhelming in the room. I did fix up a few little spots with a small fine paintbrush where the tape had leaked, but overall the lines came out decently well. I think the damp cloth thing actually worked, so definitely do that if you try this (or any other painter's tape project) at your pad.
It took a full day to do the mural, but that was because it had to be done in stages. This is such a do-able project for anyone… so don't be intimidated! Just some paint, tape, and a bit of patience. No artist skills necessary.
And the other sweet part is that it's so budget-friendly. We already had the paint and tape on hand, but it wouldn't cost more than $30 at the hardware store for the supplies (you would only need a quart of each color).
Get the Look:

Want More Nursery Ideas?
You can see how I createda black and white accent wall using decals.

Or out how we did my daughter's mint and pink nursery. It's all kinds of sweet and full of DIY project ideas.
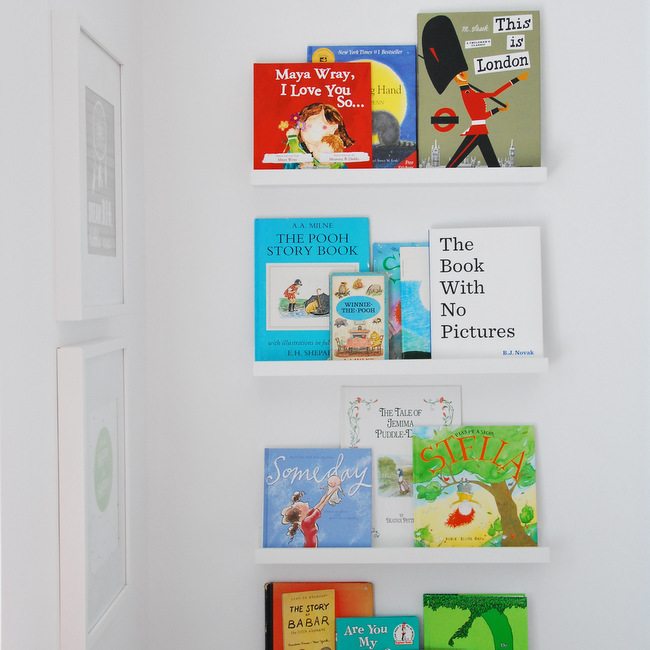
Or which IKEA racks I think are best for kids books! The spice racks or picture ledges? I've tried both!
So what do you think… have a mountain range mural in your future?! Have you guys been decorating any nurseries or kids rooms? Or have you painted any kind of mural before? I'd love to hear about it!
Source: https://thesweetestdigs.com/a-diy-nursery-mountain-mural/
